Wednesday, December 17, 2014

Memorial Ornaments

Hanging of the Memorial Ornaments at my church.


Many years ago, long before I started attending church here, someone at the foresight to create memorial ornaments in memory of a loved one, who had passed away during the year, and hang them during church on the Christmas trees.

We are a small country church, but it means the world to have these ornaments each year to help us reflect on those who have gone on before us.  I print the bulletin for church and run the projector on Sunday's, so on Saturday I found my ornament  for my brother and went ahead and hung it.  I have to admit, even though he has been gone for six years, I can still break down and ball at the drop of a hat.

This one ornament, in memory of my brother L.T. Wilkinson means more to me than any other ornament that I hang.  Plus, I love that it is hung in church. 


Bill has ornaments that he hangs as well in memory of his family members.
This is the one for his mom, Sue...

For his grandma, Pauline...

And for his grandpa, Randolph...

If you've lost a loved one this year or in the past, I know how heavy your heart is.  Take the time to make, or buy, a simple ornament for that person and make it a Christmas tradition to hang it on your tree every year.  Better yet, start it in your church like we did, and have everyone participate.  It is truly a blessing.

Merry Christmas!


Tuesday, November 18, 2014

So Very Thankful!

Each year seems to go by quicker and quicker.  I don't remember time passing as quickly when I was in high school sitting in class after class.  I mean it wasn't that long ago we were getting ready for Y2K...oh, wait - that was 14 years ago.  Where does the time go?

Bill has a meeting tonight, so it's just the me and the fur babies.  I enjoy quiet time at home, especially since it doesn't seem to happen all that often.  I was thinking today about our holiday plans and that led me to thinking about things I am thankful for.  My list is fairly long as I tend to ponder on the positives rather than the negatives. 

So here it goes (and in no particular order the condensed version):

1) I am thankful that I know Jesus Christ as my Lord and Savior.  There have been many events in my life that I would not have made it through if I had not had faith. 

2) I am thankful for my husband.  He comes across mean and gruff, but he is a teddy bear.  Honestly, all he has ever wanted is for everyone to get along.  I remember his sister crying one day and he wanted to know who made her cry.  Although she was a grown woman, he loved her and wanted to protect her. I am also going to put my fur babies here: Sadie, Libby, Harley and Dusty.

Sadie with snow on her nose: 11-17-14.


2) I am thankful for the 22 years that we had to spend with my brother LT.  Even after 6 years, his death is still vivid in my mind and I miss him more than words can say. 


3) I am thankful for parents that disciplined me and loved me.

4) I am thankful for my church, the congregation and the fellowship that we have each week.

5) I am thankful for all the children out there that call us Uncle Bill and Aunt Lis, even though we aren't really related.  We love each one of them with all of our hearts.

6) Finally, I am thankful for all of you.  I don't write all the time, but I have enjoyed blogging.  The recipes that I put on here are ones that I actually serve and eat and not just ones that I've tried and would never make again.  Cooking is one of my passions and I am fortunate that I get to cook often.

Here's to you this 2014 holiday season!

Friday, October 31, 2014

Totally Addictive Hawaiian Sweet Roll Appetizer

Totally Addictive Hawaiian Sweet Roll Appetizer     

Warning! These are very addictive and will be gone in minutes.  If you're looking for a good appetizer to make for a party or take to a tailgate - this is it!  I would encourage you to double the recipe as it won't take long for these to be gone!  It's sure to be a hit, I promise.

Ingredients:
1 package of 12 count Hawaiian Dinner Rolls
1 lb Black Forest Ham (really any kind works)
12 slices of Provolone cheese
1 (8-oz) tub of Philadelphia Chive and Onion Cream Cheese Spread


1/2 cup of butter, melted
1 T Worcestershire sauce
1/2 T dried minced onions
 

1/4 cup Grated Parmesan Cheese


Directions:
Preheat the over to 350 degrees.  Cut the rolls in half.  Place the bottoms of the rolls in a 9x13" pan.  Next please equal amounts of ham on each roll and then top with the Provolone cheese.  Spread the tops with a good portion of the Chive and Onion cream cheese spread and place the tops on top of the cheese making them into sandwiches.


In a small bowl, melt the butter.  Add the Worcestershire sauce, minced onion and Parmesan cheese over the tops of the sandwiches and let them sit for about 15 minutes.  Cover the pan with aluminum foil and bake for 20 minutes or until heated through!


Thursday, October 16, 2014

How to Dry Onions from the Garden

One of my favorite things to eat in the summer time is onions and tomatoes.  I remember when I was young, my grandpa would pull a green onion out of the ground, clean it and then let me eat it.  Awww, those were the days...


In my garden this year, I went big.  Go big or stay home right?  I planted 5 rows of onions, several varieties, and I dried them out and hung them in my pantry to store for winter use.


Drying onions is very simple.  When the green stems start to die off, or when the onion has outgrown the hole you put it in, pull the onions and let them dry for about two days out in the sun so that the skins can harden up.  Air needs to reach the entire onion, so if you don't have something to put them on that has good ventilation, you might want to rotate your onions every other day.


I had my onions laying on our flatbed trailer, but Bill needed the trailer, so I had to move them.  I laid them out on the front porch where they would be in the shade most of the day, but where it would still be warm and breezy for them.  You can see that some of the onions still have very green stems while the others are starting to turn brown and shrivel up.  This entire process can take between 2 and 4 weeks.

The onions are finished drying, or "curing" once the stems have all turned brown and are completely dried up.  Additionally, the skin on the onions should have a withered look around the stem.  Once the onions were to this point, I clipped the stems/tops off the onions leaving about 1/4" - 1/2" from the bulb.  If you don't leave at least that much space, the neck of the onions won't dry out and could possibly rot when you store it.

The next thing you will want to do is have several pair of pantyhose, yes pantyhose on hand so that you can store your onion in them.  To store your onions in pantyhose, simply cut off legs of each hose, and drop an onion in one of the legs.  Make a not at the top of where the onion is and repeat until the leg of the pantyhose is full.  This is a very cheap way to store onions and still allow them to breathe.

After you have the onions in the pantyhose, you are ready to store them.  You should choose a dark, cool area that stays between 40-50 degrees year round.  For some people, this might be your basement or a root cellar.  We simply shut off the heat vent in one of our rooms and block out the light from the window through the winter time.  If the area that you store your onions in becomes to hot, the onions will begin to sprout, if it's too cold the onion will begin to rot.  

When the times comes that you need to use them, simply cut them off the pantyhose!


Tuesday, October 14, 2014

How to Use a Pressure Canner

If you have never used a pressure canner, let me assure you that it's not as scary, or as hard, as you might be led to believe.  In fact, it is so user friendly that you'll be kicking yourself for not trying it sooner.  I have a Presto 01781 Pressure Canner and I love it.  You can get a good Pressure Canner for around $75.  Some may be a little cheaper, but most of them will cost between $50-$100.  My Presto will hold 7 quarts at once.  I also have an older Pressure Canner that I bought off of my friend Ruth.  They are both wonderful!  The picture below is of the newer Pressure Canner.


Ok, so let's learn how to use this canner in what I would like to say is simple terms...

The first thing you want to do is READ the directions.  Yes, read them.  I don't like to do it either, and I didn't understand them when I was done, but I read them so at least I had a working knowledge of what parts and pieces my canner had.  Next, follow the instructions and clean it before using it.  Get familiar with it.

Once you are ready to start canning, you will need right at 3 quarts of water in the canner.  You want the water to be around 3" deep.  The first time I used my canner, there was an indention on the inside that showed me how far to fill the water up to.  However, after I used it 2 or 3 times, I could no longer tell where the indention was, so using the 3 quarts of water works about perfect for my canner.  


After you have filled your canner with water, I suggest putting it on the stove and turning it on the lowest setting, until you're ready to put the jars in.  Once you put the jars in the canner, twist and lock the lid in place on the pressure canner. Turn the stove onto the highest heat setting and wait for a steady steam to start coming out of the vent pipe.  When this happens, set a timer for 10 minutes and let it vent.  After the 10 minutes, put the pressure weight onto the vent pipe.  The pressure in the canner will now start to slowly rise.


This is the pressure weight on top of the vent pipe.

*********DO NOT TAKE THE PRESSURE WEIGHT OFF FOR ANY REASON*********

As the pressure begins to rise, the safety valve will pop up.  The lid is now fully locked.  You may notice that some water or steam might escape through the safety valve as the pressure inside the canner goes up.  This is perfectly normal and is an excellent safety feature of the pressure canner.

Safety valve


Once the pressure gauge is at the pressure you need it at...let's say 10 pounds of pressure for green beans...I would let it go over a pound to 11 just to be safe, you will want to adjust the heat on the stove to keep it at that constant pressure.  The processing time begins when the pressure gauge reaches the correct pressure.  When this happens, you will want to set your timer at this point for however long your items are to cook - for green beans it would be 25 minutes.  You will need to watch the pressure gauge the entire time and make adjustments to the heat accordingly.


Pressure Gage

When the timer goes off, turn off the heat and remove the canner from the stove.  Let the canner depressurize at room temperature.  Again, DO NOT TAKE THE PRESSURE WEIGHT OFF FOR ANY REASON.  You will notice that the dial will slowly come back down to 0.  Once the dial is back to zero, I usually weight another 10 minutes before removing the lid.  At this point, you can remove the pressure weight.  Be careful when removing the lid, as the steam will be hot and can cause burns. Lift the lid away and set to the side (I usually set mine on pot holders because it is so hot).  Again, I wait another 10 minutes before removing the jars and placing them on a clean towel on my counter.

What do you think?  Not that hard, but it takes a lot of patience.  I had pressure canned with my mother-in-law at one point, but wasn't comfortable doing it myself until a friend showed me.  Hopefully these instructions and pictures will help.  Happy canning!


Thursday, September 25, 2014

Tomato Soup Canning Recipe

There's no doubt about it, it has been an incredible year for the garden.  I have literally canned so much that I ran out of jars twice and had to clean out  cabinets to make room for all my canned goods.  It will be quite the reward this winter when we are eating from our stocked pantry.

Last year I received a recipe from one of our 4-H Grandma's for Tomato Soup that is pressure canned.  This soup is delicious and perfect for eating with a grilled cheese sandwich on a cold Winter's (or Fall) day.

Tomato Soup

Ruby Hoop's Regal Tomato Soup Recipe


6 medium onions
1 bunch celery
8 quarts cut-up tomatoes
(I used about 24 pounds worth)
3/4 cup sugar
(I only used 1/2 cup)
1/4 cup salt
1 cup butter or margarine
(make sure it's at room temperature)
1 cup flour


Chop the onions and celery and put them into a large kettle with just enough water to start a good boil and prevent scorching. Add the tomato pieces (no need to peel off the skins) and cook the vegetables until they're tender. Then put them through a food mill to remove seeds and chunks, and return the pulp to the kettle along with the sugar and salt. Cream together the butter and flour, add the well-blended mixture to the boiling purée, stir thoroughly, and continue to simmer the combination until it thickens slightly (to about the consistency of thin gravy). Pour the soup into hot jars and process in a pressure canner for 10 minutes at 5 pounds. At serving time, (I omit this step when serving but you are welcome to do it) empty the concentrate into a saucepan, add 2 pinches of, soda per pint, warm the tomato mix slightly, and dilute it with an equal amount of milk or water. Then heat the soup to eating temperature. 

For a publication on tomatoes and canning visit The University of Maine.

Wednesday, September 10, 2014

How to Get Rid of Fruit Flies

Do you ever have fresh produce in the house and notice fruit flies hovering around it?  Or have you ever brought in items from the garden and had fruit flies?  I am not a fan of these tiny insects.  I feel like I have an unclean house when I see them flying about. Over the years I have learned a trick on how to get rid of these nasty pests and I wanted to share it with you.  The picture is disgusting, but as you can see, it works.


All you need is Apple Cider Vinegar and Dawn dish soap.


Combine the two ingredients in a disposable dish. I usually do 3/4 cup of Apple Cider Vinegar and 3-4 drops of Dawn. 

Leave the container out on the counter close to the produce and within 24 hours, they will be in the disposable container that you can just throw away.  Easy, simple and fool proof.  Give it a try!

Tuesday, September 2, 2014

Slow Cooker Chicken and Noodles

Time is often of the essence at my house.  Although we do not have children, we seem to be busy all of the time.  If there isn't a night meeting to attend, there is something to be done on the farm.  With that being said, I ran across this sign at the Indiana State Fair in the Pioneer Building..."Without good farming, there can be no good food.  Without good food, there can be no life." 

Bill and I strive each year to be good stewards of the farm ground that we are entrusted with by our landlords.  We want to be good farming neighbors to those that live around us. We also like to eat "good" food.


Everyone enjoys chicken and noodles, but when you run short of time, try using your slow cooker!


Slow Cooker Chicken and Noodles

Ingredients:

4-5 boneless/skinless chicken breasts
2 cans (14.5oz) of chicken broth
2 cans (10.5 oz) Cream of Chicken Soup
1/2 cup of butter
24 oz bag of frozen egg noodles


Directions:
Put the first 4 ingredients in a slow cooker and cook on low for 5-6 hours.  Remove the chicken and shred (I actually shred the chicken in the slow cooker).  Return the chicken to the slow cooker , add the egg noodles and cook for another 2-3 hours (until the noodles are tender).  Add salt/pepper to taste.

For a complete meal, serve these with Slow Cooker Mashed Potatoes and Homemade Sweet Rolls.

Wednesday, August 27, 2014

Sweet Pea Salad

Eating peas right out of the garden is one of the best parts of my summer.  I only wish that Bill enjoyed eating them as much as I do.  He doesn't dislike them, but they aren't his favorite neither.  Several years ago, I came across a recipe for Pea Salad and adapted it.  Bill will actually eat several helpings of it, so you know it has to be good:)


Judge for yourself...


Sweet Pea Salad


Ingredients:
1 (12oz) bag of frozen (or fresh) sweet peas, thawed and drained
1/4 cup of diced onions
1 cup of peanuts or sunflower seeds
1 lb bacon, cooked crisp and crumbled
1 t sugar
1 T and 1 t of vinegar
1/2 cup mayo
1/4 t soy sauce
1/4 t Worcestershire sauce


Directions:
Combine the mayo, vinegar, sugar, soy sauce and Worcestershire sauce together in a small bowl.  Whisk well.  Add the remainder of the ingredients to another bowl.  Top with the mayo topping and combine well.  Let set in the refrigerator for at least an hour before serving.


Friday, June 13, 2014

Happy Father's Day

One of my favorite things in the entire world is when my Dad shows up at my office and takes me out for lunch.  Since my parents live in another state, I don't get to see them as often as I'd like.  When Dad comes to Indiana, he usually surprises me by just showing up.  I am always excited to see him and it's the highlight of my day.


My Dad and I getting ready to go to lunch.
Had to take a selfie first!


My Dad, is really my step-dad, but he adopted my brother and I when we were younger (it's a long story, but my parents went through an ugly divorce) and has treated us as his own ever since.  I can't thank him enough for always being there for me and I can't thank my two step-sisters and step-brother enough for sharing him with us.

Dad,

  • You didn't have to take on the responsibility of providing us with food, clothing and shelter - but you did. 
  • You didn't have to take on the responsibility of making sure we went to church and had a relationship with Jesus - but you did.
  • You didn't have to take on the responsibility of making sure we had a good education and a positive upbringing - but you did. 
  • You didn't have to love us like we were your own - but you did.
Although there have been several important men in my life (my grandpa's, Bill and my brother's) my Dad has always been that one constant and voice of reason for me.  Here's to my Dad on Father's Day and to all of yours!
  

Wednesday, May 21, 2014

Slow Cooker Pork BBQ

Slow Cooker Pork BBQ


One of my favorite go-to recipes is for Slow Cooker Pork BBQ.  It's quick, simple and there isn't a lot of work involved.  I have to admit though, I am a little weird...I eat mine with potato chips instead of on a bun. This is also an easy recipe to make and take to the guys if they are in the field.  I simply make their sandwich up, wrap it in aluminum foil to keep it warm and deliver it with some chips and a cold drink and they are happy little farmers!  You can also find this delicious recipe on the McCormick website!

SLOW COOKER PORK BBQ

Ingredients:
3 pounds boneless pork shoulder roast
1 package of McCormick's Slow Cooker BBQ Pulled Pork Seasoning
1/2 to 3/4 cup of ketchup
1/2 to 3/4 cup firmly packed brown sugar
1/3 to 1/2 cup of cider vinegar

Directions: 
Place pork in slow cooker.  Mix seasoning mix, ketchup, brown sugar and vinegar until blended.  (We like ours with a lot of sauce, so I usually use 3/4 cup of the ketchup and brown sugar and 1/2 cup of cider vinegar).  Pour over the pork.  Cover and cook on low for 8 hours or on high for 4 hours.  After the pork has cooked, remove it from the slow cooker, and shred it using 2 forks.  Put the pork back in the slow cooker.  Mix and heat it with the sauce before serving.

Friday, May 2, 2014

Basic Baked Beans

Basic Baked Beans


Baked Beans can go with just about any meal and is a staple at most summer cookouts.  I admit that I have no tried and true recipe for them.  I've tried several and honestly, I think it boils down to how you are used to them being made.  That being said, here is a basic recipe that you can adapt easily and call it your own.


Basic Baked Beans

Ingredients:
1 large can of baked beans (any variety)
1/2 c chopped onion
2 T mustard
2 c ketchup
1 c brown sugar
3 to 4 slices of bacon

Directions:
Mix all ingredients together.  Pour into a casserole dish and place bacon strips on top.  Bake at 350 degrees for 1 to 1.5 hours.

Thursday, May 1, 2014

Beer Simmered Smoked Sausage and Potatoes

 
Beer Simmered Smoked Sausage and Potatoes

I could eat smoked sausage every day.  There is just something about it that my taste buds like.  After surfing the Internet the other day, I came across this new favorite recipe from Hillshire Farm.

It was very easy to prepare on a night that I came home late.  I didn't have a few of the ingredients, but it still turned out delicious.  The flavor was addicting.

The only thing that I might do differently next time is to add some peppers to the recipe.  If you are looking for a quick evening go to meal, this would be perfect.  Thank you Hillshire Farm for a yummy meal!

Beer Simmered Smoked Sausage and Potatoes

Ingredients

  • 1 pkg. Hillshire Farm® Smoked Sausage
  • ¼ cup butter or margarine
  • 1 onion, chopped
  • 4 garlic cloves, minced
  • 1 bottle (12 ounces) regular or non-alcoholic beer
  • 2 lbs. red potatoes, cut into 1” cubes (about 6 cups)
  • 3 green onions, thinly sliced
  • 1 teaspoon salt
  • ½ teaspoon ground black pepper
  • 2 tablespoons chopped parsley

Directions:

  1. Cut sausage into ½”slices. Melt butter in a 4-5 quart pan over medium-high heat. Add sausage, onion and garlic; cook 3-4 minutes, stirring frequently until onion is soft and sausage is lightly browned.
  2. Add beer and potatoes; bring to a boil. Reduce heat to medium, cover and cook 15-20 minutes or until potatoes are just tender.
  3. Stir in green onions, salt and pepper. Increase heat to medium-high and cook uncovered for 4 minutes or until liquid thickens slightly. Sprinkle with parsley and serve.

Sadie Girl

My beautiful Sadie!

 
I admit it!  I am a pure sucker for fur babies.  Sadie, our lab-chow mix, who has never (in the eight years we have had her) left home...until April 15th.  On this particular day, Sadie was there in the morning when I left for work, but when I came home that evening, she was no where to be found.  Bill didn't want to jump to conclusions and said she would probably be back later. 

When the next morning came and there was still no Sadie, I was concerned and so was Bill.  He spent most of that day driving around the farm and up and down the roads, checking the ditches, looking for her.  No luck. Wednesday, April 16th came and went with no sign of Sadie.  On Thursday, April 17th, Bill enlisted the help of a friend and searched the woods and neighboring fields.  Nothing.  By this point, I am beside myself.  Where did she go?  What happened to her?  I had Good Friday off, so I was determined to find her.  Libby, my other lab, and I took the Gator and went on a 5 hour search...still no Sadie.  By that evening, I had given up hope and started to accept the fact that something tragic had happened to my precious pup.  

Saturday morning came and Bill had gone into town.  Libby and I were sitting on the front porch when he came home.  As he came up closer to the house, he was pointing in the back yard.  I thought he was nuts UNTIL I figured out that Sadie must be back there.  I ran to the backyard and there she was.  A bloody mess.  She had been hit. Her back right leg appeared to be broken, her front left paw was split wide open, there was a huge gash in her side and part of her right arm pit was hanging down.  She looked awful and all I could do was cry and tell her I loved her as I tried to comfort her.

Bill got the truck and pulled it up in the yard to where she was, I got a blanket and a towel to wrap her in so she wouldn't get blood everywhere and Bill lifted her in the truck.  She never made a sound, but I could see the pain in her beautiful brown eyes.  My baby had come home, but she was hurt.

The next few hours were so stressful.  We took her to Country Acre Animal Clinic where Dr. Nathan Rich said he would check her over and call me.  We were sent home.  Within the hour Dr. Rich called and gave me a detailed report of her injuries.  Bill and I talked and discussed putting her down...but she was our first pet together as a couple and we love her so.  No, that wasn't an option.  We would do what we could to save her.

I urge anyone who hits an animal to STOP and tell someone.  If we had known Sadie had been hit, we could have provided care for her wounds a lot sooner.  Accidents happen, but driving off and doing or saying nothing is not acceptable.

I must warn you that the following pictures are a little gross and little ones should not look at these.  When I was finally able to visit Sadie, this is how my poor baby looked (but she was alive)!

Sadie, with the cone of shame.  She hates that thing.


This is the huge gash in her side that they had to stitch up.
The thing that looks like bone sticking out, is actually a drain tube.


This is the leg she had surgery one because it was broken.
She now has a splint on there as well because she keeps trying
to put weight on it.

This photo shows her armpit and again the things that look
like bones are actually drain tubes.  You can see they have
wrapped the left front leg with a wet/dry bandage.

This is my baby once she finally came home.
She needs a bath, but that will wait until she is better.
She likes for us to rub her belly while she lays on the floor and snores!
 
Sadie will have several long months of recovery but for now she is doing well and healing nicely.  She will be 11 in October and we are thrilled that we will still have her around with us.

Tuesday, April 15, 2014

It's Time for Baby Chicks

Spring is finally here and I could not be happier.  After the rough, frigid temperatures and the never ending piles of snow, this girl was thrilled to put on Capri's, flip flops and a t-shirt!  I must admit that it was short lived.  Today, when I woke up there was a dusting of snow on my car.  Only in Indiana does it seem that the temperatures fluctuate so drastically on a daily basis. 

One thing I really enjoy about Spring, is all the baby chicks we start raising.  I actually purchased about 70 back in February.  I do this every year, however, the first batch I received from the hatchery didn't survive the cold journey on the mail truck.  The post office called to tell me there was no chirping or movement in the box and I should think about refusing the package.  I refused the package and called the hatchery.  They were so kind and sent another shipment to me within a week.  All of these survived but two.  If you are just starting out and want a good hatchery to purchase from, I suggest McMurray Hatchery.  They are wonderful to work with and their birds are of the highest quality.


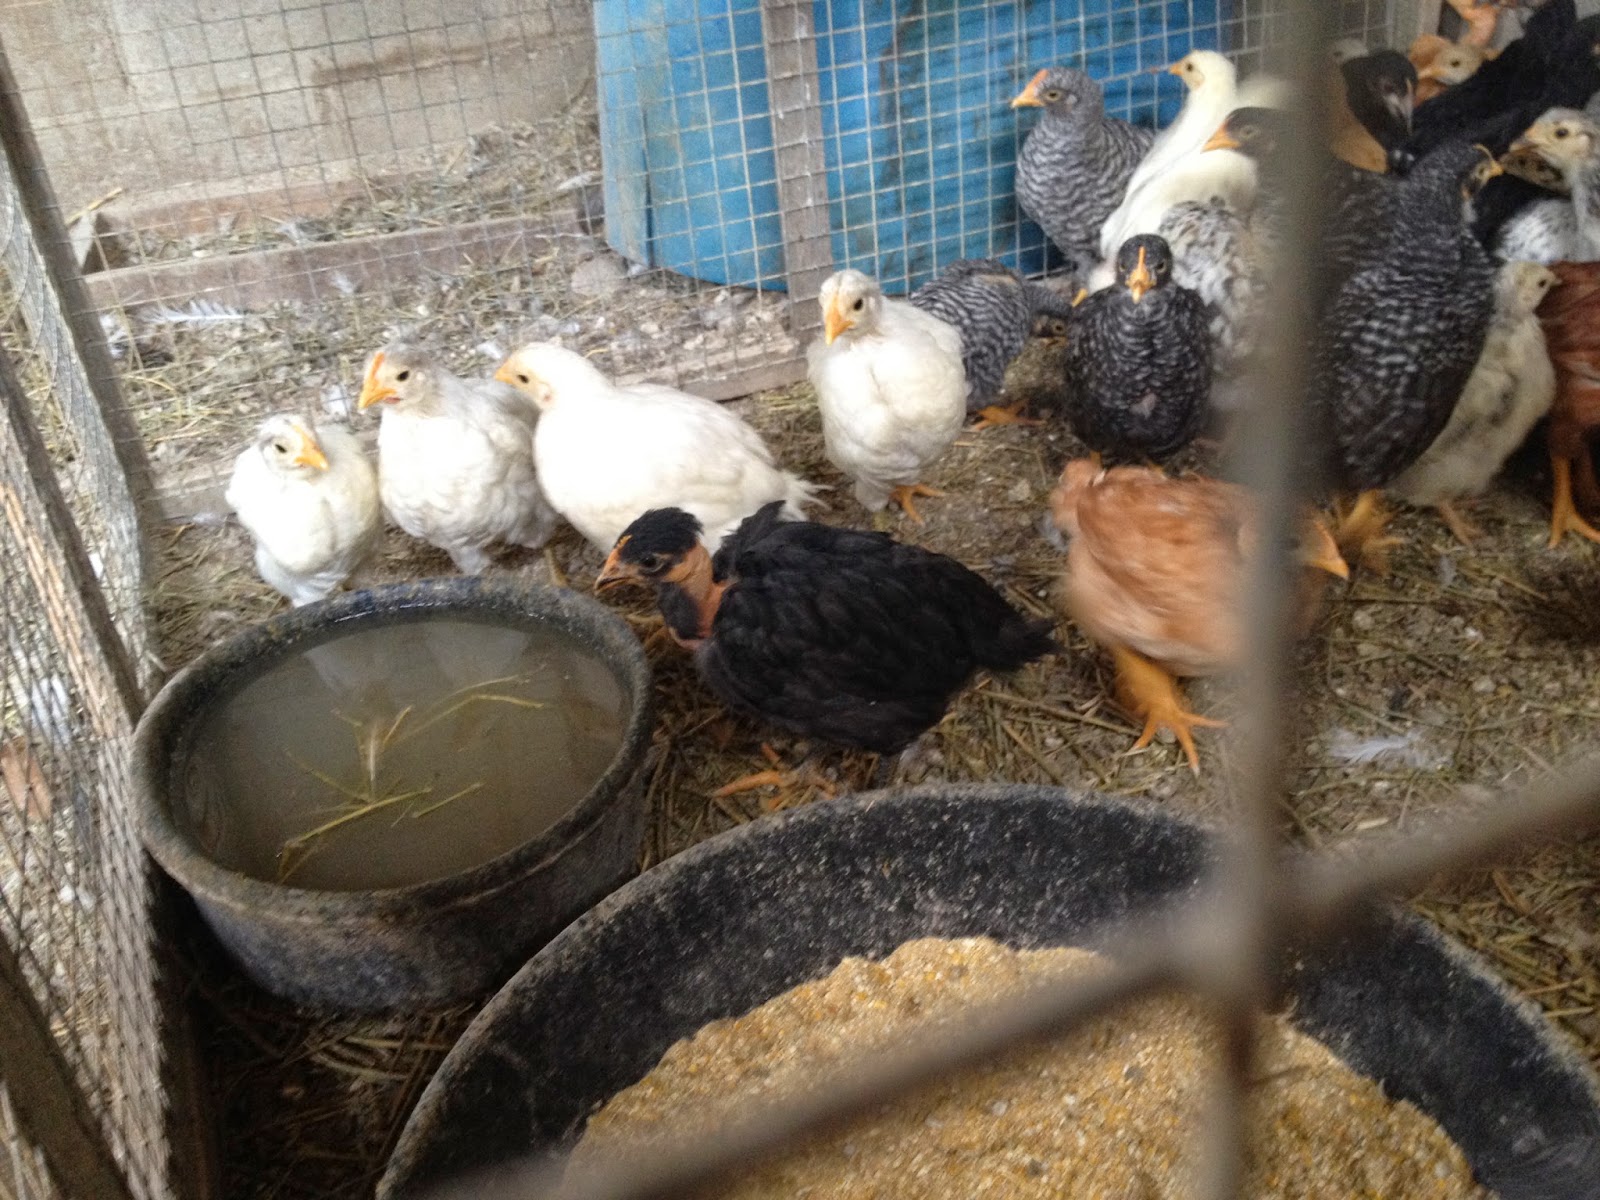
These pullets are now about 2 months old.  We kept them in the garage with the heat lamps to start off with and we have now moved them to the small barn where they will be free to roam around inside and outside (when I am home to supervise them and watch for predators).  At this particular age, the pullets are easy pray for predators when they are outside.  Falcons and hawks will swoop down and take them when you're not watching closely.  We have also had trouble with minks, raccoons and neighboring cats trying to prey on these sweeties.  Fortunately, we have our faithful dogs, Sadie and Libby who diligently help control the predators.


I'm not really supposed to share this picture with you (thus him pointing the finger at me), but I couldn't resist.  After we had moved all 70 of the chicks, Bill "reclined" on the cement to take a break.  I can't say enough good stuff about my husband...I fall deeper in love with him everyday.  He doesn't particularly like the chickens, but he loves me and it shows...maybe not by this picture though!  Lol!  It's probably a good thing Bill is there to keep me grounded, or we would have an entire farm of different animals by now.


If you are considering starting a backyard chicken project, I would strongly suggest this time of the year.  The Spring weather is perfect for baby chicks (after being under the heat lamp for a few weeks) and for you.   The baby chicks above were hatched at the 2014 Henry County Ag Day event where all the first graders in the county schools came out and learned how pizza ingredients come from a farm.  These little lovelies came back to the farm with me along with two adorable cats.  It's really awesome to teach kids about farm life and for them to learn that their food comes from hard working farmers and not from the back of a grocery store.  Before you purchase any type of animal, make sure you have adequate shelter, food, water and anything else they might need.  If it's chicks, be sure to have a heat lamp (or two), shavings for them to walk on and a good dry area/container to keep them in.
 
Here's to you and a Happy Spring!

Tuesday, April 1, 2014

Struggling through PCOS


As a high school student, I noticed that I had really bad acne and a lot of facial hair.  That "time of the month" was horrible for me.  Although I was alarmed, especially with all the facial hair, everyone seemed to shrug it off.

It wasn't until my mid-20's that I had gone to the doctor and sought treatment for not being able to get pregnant.  It was then, that I learned that I had PCOS...Polycystic Ovarian Syndrome.  I had no clue what this was, but would soon discover that it's something that I will spend the rest of my life trying to deal with.  It would also cause an infertility nightmare.

PCOS is basically a hormone disorder among women of reproduction age.  There are small cysts that attach themselves along the outer edge of the ovary.  As if this wasn't displeasing enough, the symptoms can include:

  • Acne
  • Excessive hair growth
  • Type 2 diabetes
  • Irregular periods
  • Obesity
  • Infertility
  • AND MORE!

I have almost all of these symptoms and went through many procedures trying to conceive.  I have to tell you that not being able to have a child of my own is one of the hardest things I have ever had to cope with in my life.

As I started to get closer to my 30th birthday, I really wanted to have a child.  I began to see specialists in the fields of infertility.  Although some of the options seemed a little far fetched, we were willing to pursue what avenues we could afford.  Keep in mind, there are always payment plans!

We began small with several insulin helping medications to see if it would help my ovaries release an egg.  Until you have gone through this, you have no idea how much of an emotional roller coaster infertility is.  Every time you check to see if you might be ovulating (or pregnant), it's heart wrenching to know that you are not.  After the insulin medications, we stepped it up a notch to shots.  Now this was a fun time -- NOT!  Long story short, it didn't work either.

At this point, money is running short and most insurances, including mine, do not cover infertility treatments.  The specialists, whom I was growing tired of seeing so much, suggested that we try invitro.  Invitro fertilization is expensive and they do have payment plans.  For one go around of invitro, taking 3 of my eggs and combining it with sperm was going to be around $20,000 (give or take of course) and so much had to be paid up front.  This is where it came down to the nitty gritty.  I don't know about you, but most average people don't have that kind of money just laying around.  We were blessed to have help with some of the other treatments, but this was a huge amount of money for no actual guarantees of having a child.

The actual stress of my body trying numerous medicines, the emotional toll it was taking on me mentally and the spiritual journey of not understanding why God had not entrusted me with such a special gift became almost too much to handle. 

After a lot of prayer and discussion of if we should try invitro or pursue adoption, it was decided to do nothing.  I know there are a lot of kids in the world who need loved, my (step) Dad adopted me and my brother, but for some reason, it wasn't an avenue that was pursued.  Later in life, when I divorced my first husband, I was able to look back and be thankful that there wasn't a child trapped in the middle of a divorce.

I will tell you that all of this did not just go away.  It was heart breaking.  I went through a depression.  I couldn't attend baby showers, or be happy for co-workers and friends that were pregnant.  Every little baby that I would pass at the grocery store, brought tears to my eyes.  Nothing in my life made sense and I found myself asking God, "why me?" 

I was finally given the book from Focus on the Family called, "When the Cradle is Empty."  What a book.  Everything in there is accurate.  I learned that by not being able to have a child, I had to go through a grieving process over a child that I never even had.  Plus, I learned that God would use me in other ways.

I believe that God has placed me in my current job at the Extension Office for a reason.  For 2 full weeks during the month of July, I consider myself truly blessed to have a family of over 500 4-H youth that I get to see, love, encourage and support during the annual county 4-H fair.  I have an adoring husband who makes my life complete and nieces and nephews that I spoil even more because I don't have children of my own. 

I often wonder who will come and see my when I get old and am in a nursing home.  My heart still aches knowing that I don't have that special son or daughter to watch over me in my old age, but I know that somehow God will provide.

I still struggle with PCOS.  The facial hair and the weight gain are the most embarrassing aspects, but I know it's not the end of the world and that God loves me (and YOU) no matter what we look like, what we've gone through or where we have been.  Without my faith in God, I couldn't have made it this far.

For more information, visit: http://www.pcosfoundation.org

Thursday, March 20, 2014

The Perfect Chocolate Chip Cookie Recipe

Chocolate Chip Cookies


I've been on a cookie kick lately, making them, eating them, freezing them...they are good no matter what.  For years, I have been trying out different chocolate chip cookie recipes, but just had never come across the perfect one until now.  I guarantee you that these cookies are going to be a hit at your house.

The Perfect Chocolate Chip Cookie Recipe

Ingredients:
1 cup packed brown sugar
1 cup butter, softened
3/4 cup of sugar
2 eggs
1 1/2 teaspoon of vanilla extract
2 2/3 cups all-purpose flour
1 1/4 teaspoon baking soda
1 teaspoon salt
1 (12oz) package of semisweet chocolate chips

Directions:
In a large bowl, cream the brown sugar, butter and sugar together until light and fluffy.  Beat in the eggs and vanilla.  Combine the flour, salt and baking soda and gradually add it to the creamed mixture and mix well.  Stir in the chocolate chips.

Shape the dough into balls and place about 2" apart on a greased cookie sheet.  Bake at 400 degrees for 10-12 minutes or until edges are golden brown.  Cool and store in an air tight container.

Note***We ate the first batch of these cookies, BUT I made a second batch and froze them in ice cube trays to make later.  I covered the ice cube trays with parchment paper and aluminum foil and store them in the freezer.  I have to admit that I've eaten several of these raw (I know, I know - I am not supposed to do that, but I did and they were delicious)!  Plus, it is an easy and fast way to make cookies when time is of the essence.

Wednesday, March 5, 2014

Texas Caviar

I admit it...I was a slacker the month of February.  We were enrolling youth in 4-H, there was snow (lots and lots) on the ground and the temperature seemed to always be freezing.  With all of that going on, the only things I really wanted to do (and did) was read and curl up on the couch with the cat and dog and watch movies.

Now March is here and I am ready to get back in the saddle again.  I've decided as of last night, that I am no longer going to drink pop.  My husband has me hooked on Diet Mt. Dew and I just don't need to consume that anymore.

Enough rambling...

Bill and I were recently introduced to this new type of "salsa" and I must say it is addictive.  If you are having friends over, or a Super Bowl party, this would be a wonderful dish to serve up.  Be prepared, because this make a BIG batch.  The picture is deceiving (I know it doesn't look appealing, but you will have to trust me on this one) as far as looks go, but the taste is exquisite.


Texas Caviar
 
 
Ingredients:
2 (15 oz) cans of shoe peg corn
1 (15 oz) can of black eyed peas
1 (6 oz) can of chopped green chiles
4 small tomatoes chopped (or just mix in some salsa you have on hand)
1 chopped green pepper (optional)
1 chopped large onion
2 T of minced garlic
1 bunch of green onion, chopped
1 medium sized bottle of Zesty Italian dressing
Tortilla Chips
 
 
Directions:
Mix all ingredients together in a large bowl.  Cover and refrigerate overnight.  Drain before serving.

Thursday, February 13, 2014

Pioneer Woman's Dark Chocolate Brownies


Pioneer Woman's Dark Chocolate Brownies
 
I admit it, I love most things sweet...especially brownies.  On one of our recent snow days (and there have been quite a few), I was looking up recipes to use some of my unsweetened chocolate that I had in the cupboard when low and behold I came across this recipe.  If you like chocolate, rich chocolate, then these brownies are for you.  When they first came out of the oven and were warm, I fixed a glass of milk and ate 2 of them!  They are delicious.  Of course it's a recipe from the Pioneer Woman so you know it has to be good.  Beware: these will go fast!
 
 
(this link has her step by step instructions with pictures)!

Ingredients:

  • 1 cup Butter
  • 5 ounces, weight Unsweetened Chocolate
  • 1/4 cup Unsweetened Cocoa Powder
  • 2 cups Sugar
  • 1 Tablespoon Vanilla
  • 3 whole Large Eggs
  • 1-1/4 cup Flour
  • 3/4 cups Semi-Sweet Chocolate Chips
  • Powdered Sugar, For Sifting
Directions:

Preheat oven to 350 degrees.
In a medium-large saucepan, melt the butter with the unsweetened chocolate over low heat, whisking occasionally until smooth and melted. Sprinkle in cocoa powder and whisk to combine. Remove the pan from heat and allow to cool for about 5 minutes.

Stir in sugar and vanilla until just combined.  One at a time, stir in the eggs.  Gently stir in the flour until halfway incorporated. Add the chocolate chips and stir just until combined.

Pour batter (it will be very thick!) into a greased 8 x 8 or 9 x 13 baking pan. (Square pan will result in thicker brownies.) Spread to even out the top and place in the oven.

Bake for 40 minutes, then check the brownies with a toothpick. If it is overly gooey/messy, return to the oven for 5 to 10 more minutes. (Just be careful not to burn the edges.)

I didn't allow my brownies to cool all the way, but Ree suggests that you: Allow to cool completely (important!), then sprinkle with powdered sugar and cut into small squares. The brownies are very rich!


Thursday, January 30, 2014

Irresistible Potato Soup

 
Irresistible Potato Soup

 
A perk of having friends with the same interests as you, is that you can share things like recipes.  My friend Misty gave me this recipe and we have made it several times on these cold, Indiana winter days. 
 
 
Ingredients:
1/3 lb bacon, chopped (not cooked)
6 medium potatoes, diced to the size you like them (Bill like his potato soup a little chunky, so I don't dice mine as fine)
4 cups of chicken broth
2 cups of milk
1/4 cup of all-purpose flour
1/4 cup of butter
1 medium sized onion, diced
1 clove of garlic, diced (optional)
1 cup of sour cream
1/4 teaspoon of white pepper (regular pepper works too)
potato flakes (if needed for added thickening)
salt (to taste)
 
Toppings:
freshly chopped parsley
sliced green onions
grated cheddar cheese
crumbled bacon pieces
 
 
Directions:
Add bacon to a large soup pot and cook until it has rendered it's fat.  Remove and set aside.  Then add onions and garlic to bacon fat.  Cook until onions begin to be translucent and then add butter.  Let the butter melt and then whisk in flour.  Cook for 3 minutes.  Add chicken broth and bring to a boil while scrapping the bottom of the pan.  Add milk, potatoes and white pepper.  Bring back to a boil and make sure to stir constantly to avoid lumps.
 
Cook over medium heat until potatoes are very tender, stirring from the bottom every few minutes (this can be a slow process, but the outcome is worth it).  After potatoes are done, if your soup is too thick, add more broth or milk to it.  If it is too thin, add some potato flakes a few teaspoons at a time, until you get to the desired consistency that you like.  Wait about 2 minutes in between adding potatoes flakes to see what the consistency will be like before you add more flakes.  Don't forget to add salt if it tastes a little bland!
 
When soup is done, remove from hear and stir in sour cream.  Serve soup with your favorite topping(s).

Tuesday, January 21, 2014

Doritos Taco Salad


Doritos Taco Salad


Any time that you can eat lettuce, you know that leafy green stuff, you are doing good.  Growing up, my Dad always had a salad and ice tea with whatever we were eating.  I admit that I don't eat it as often as he does, but I like mixing it up every once in awhile like in this Doritos Taco Salad.

This is a great salad to throw together when you are in a hurry, or on nights that time is limited.  You can actually prepare everything the day ahead.  How easy is that?  It is also an idea dish to take to potlucks, reunions and church pitch-ins.

Doritos Taco Salad

Ingredients:
1 bag of Nacho Cheese Doritos (crushed)
1 bottle of Catalina Salad Dressing
2 pounds of ground beef, seasoned with  2 packets of taco seasoning
1 onion
2 medium size tomatoes
2 cups of shredded cheddar cheese
2 small bags of shredded lettuce OR 1 head of lettuce cut up
1 can of black olives (optional)


Directions:
Brown your ground beef and season it with the taco seasoning packets.  Drain and the beef and let it cool.  Open your bag of Doritos and squish the bag, to crush the chips.  In a LARGE bowl, add the onion, tomatoes, olives, cheese and lettuce and toss well.  Next add the chips and cooled ground beef.  Toss again.  Add the bottle of Catalina Salad Dressing (depending on your taste, you may like a little more dressing or a little less).  Toss again and serve.