Wednesday, January 30, 2013

Reese's Temptation Cookies

Is there really any better combination than peanut butter and chocolate?  I don't think so.  Recently, I was asked to make a couple of dozen cookies for a 4-H event and I couldn't decide what I wanted to bring.  After looking through my recipes, I decided on these Reese's Temptations.  I doubled the recipe so I could make a bigger batch and leave some at home:)!

Reese's Temptation Cookies

Ingredients:
About 40 Reese's Miniature Peanut Butter Cups
1 stick of butter
1 cup sugar
1/2 cup light brown sugar, packed
1/2 cup creamy peanut butter
1 egg
1/2 teaspoon of vanilla extract
1 1/2 cups of flour
3/4 teaspoon baking soda
1/2 teaspoon of salt

Directions:
Preheat oven to 375 degrees.  Remove wrappers from the candy and put the candy in a bowl.  Store in the refrigerator until needed.  Line mini muffin cups with paper baking cups.  Combine butter, sugar, brown sugar, peanut butter, egg and vanilla in a bowl and blend until fluffy.  Next add the following ingredients to the mixture, stirring after the addition of each one: flour, baking soda and salt.  Shape dough into mini 1 inch balls and place one in each muffin cup.  DO NOT FLATTEN THE DOUGH.  Bake 10-12 minutes until light brown and somewhat puffy.  Remove from the oven and immediately press peanut butter cup in the center of each cookie.  Cool completely in the muffin pan.  Enjoy.

Friday, January 25, 2013

Two Ingredient Pineapple Cake

Two Ingredient Pineapple Cake

 
I love to try new things, especially recipes.  I came across this recipe, which calls for only two ingredients and thought, I should give it a try.  WOW!  Not only was it delicious, but very moist.  Within two days, the entire cake was gone.

All you need is a box of yellow (or white) cake mix and
a can of pineapple chunks.

 
Dump the two ingredients into a mixing bowl (do not drain the
pineapple) and use a mixer to mix it up.


Spay a 9X13 pan with cooking spray and pour the mixture in it.
Bake according to directions on the cake box.


Let cool - and there you have it!  Easy! 

Friday, January 18, 2013

Bacon - Oven Style


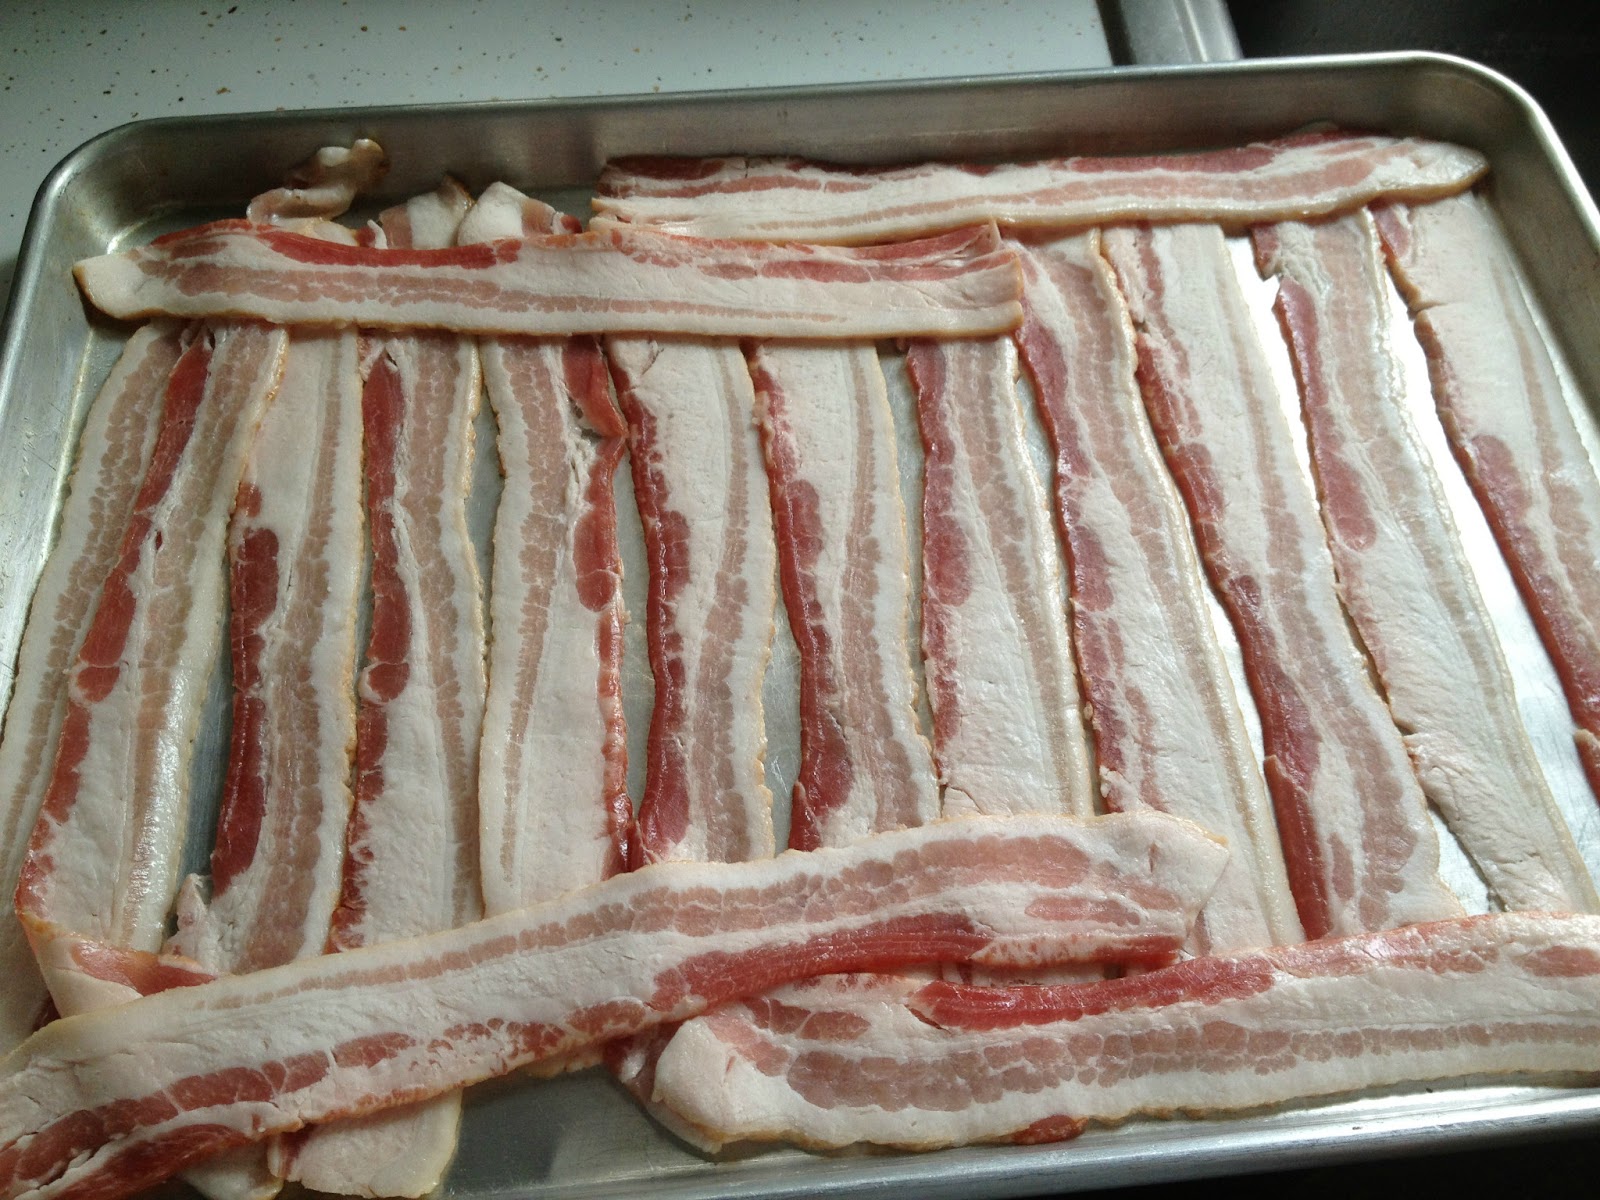
BACON!!!  Who doesn't love a good slice of crisp bacon?  After years of cooking in a skillet on the stove, I decided to try it in the oven.  To my surprise, it was marvelous and less messy.  To cook your package of bacon in the oven, just follow the directions on the back of the package.


I like to use a jellyroll pan. 
It has lips on the sides that help keep the grease in the pan.


 Start with a fresh package of bacon.
If the bacon is frozen, let it thaw at room temperature completely.


 Next, line the jellyroll pan with the bacon. 
I tend to overlap a few pieces and move them around as needed.
Put the pan in the oven and cook on 375 degrees for 30 minutes or
until it's cooked how you desire.


Take the bacon off the pan, let sit on a paper towel to drain any excess grease.
Serve.

Thursday, January 17, 2013

Sweet & Salty Almond Bark

Sweet and Salty Almond Bark
 
 
The thing that I love about this candy is that it is easy to fix and takes no time to make.  As with most recipes, you can adapt the ingredients to fit you're own personal preference. 
 
Sweet and Salty Almond Bark
 
Ingredients:
1 package of almond bark
2 teaspoons of vegetable oil
1/2 cup of broken pretzel pieces
1/2 cup of baking M&M's
 
 
Directions:
In a microwave safe dish, heat the almond bark and vegetable oil in the microwave for 2 minutes.  Stir, continue to heat for 30 seconds at a time, stirring after each interval until the bark is fully melted.  Let mixture cool for 5 minutes, then stir in the pretzels and M&M's.  Spread onto a waxed paper lined baking sheet.  Chill for 30 minutes in the refrigerator.  Take out and break into pieces.  Store in an airtight container at room temperature or in the refrigerator. 

 
Put the almond bark in a microwave safe dish.
 
 Add 2 teaspoons of vegetable oil
 
 Heat the almond bark and vegetable oil in the microwave
for 2 minutes.   Stir, continue to heat for 30 seconds
at a time, stirring after each interval until the bark is fully melted.
Let mixture cool for 5 minutes.
 
Stir in the pretzels.and M&M's
 
Stir in the M&M's

 Mix well.
 
 Spread onto a waxed paper lined baking sheet.
 Chill for 30 minutes in the refrigerator. 
 
 Take out and break into pieces.
 
Store in an airtight container at room temperature or
in the refrigerator.

Wednesday, January 9, 2013

Creamy Egg Salad


Creamy Egg-Salad

Since we live on a farm and raise chickens, it's only natural that we have egg salad from time to time.  There are all kinds of ways to make egg salad, especially since it's more of a personal preference.  Here's a recipe that I am sure you will enjoy:

CREAMY EGG-SALAD

Ingredients:

6 large hard-cooked eggs
1/4 cup mayo (I prefer the lite version)
1 1/2 teaspoons mustard
1 1/2 teaspoons of sweet pickle relish
1/2 cup finely chopped onion (can also use celery), optional
Dash of salt
1/8 teaspoon of black pepper

Instructions:

Hard boil the eggs.  Crack and peel the eggs then chop coarsely and place in a large mixing bowl.  Add mayo, mustard, relish and onion.  Blend together.  Add salt and pepper to taste.  Refrigerate until ready to serve.
Hard boil eggs. Crack and peel when done.


I use a vegetable slicer to slice the eggs.


Slice the egg one way...


Then slice the egg the other way.


Should fall apart when you're done.


Put the eggs in a small dish.


Add the relish.


Add the onions or celery.  Whichever you prefer.


Add the mustard.
 
 
Add mayo, salt and pepper and combine.
Store in refrigerator.

Tuesday, January 8, 2013

Box Mixes - To Use or Not to Use?

From left to right:  Nestle's Cookie-Brownie Delight,
Carnation's Famous Fudge and Reese's  Peanut Butter Bars.


I'm not a person that likes to skimp on making my own dessert, but this year I thought that I would try some of the mixes from a box and see how they compared.
 
The first box kit we tried was the Nestle Cookie-Brownie Delight.  There were several steps involved in making this dish and I have to admit that I was disappointed with the outcome after all the work that went into it.  This is not an item I would recommend making.
 
 
The second we made was the Reese's Peanut Butter Bars.  They were easy to make, the directions were simple and the end product was very good.  If you like Reese Cups, then you would like this.  Thumbs up for this box mix!
 
The final product we made was the Carnation Famous Fudge Kit.  The directions were easy to follow and the fudge was delicious.  All the ingredients in one box is helpful for a small batch of fudge. 
Thumbs up for this box mix.


Box mixes can save time, but they are not always as good.  In the future, I will probably only use the Carnation Fudge Kit and make the rest from scratch.  To me, they just taste better.  If you are in a real time crunch, then these recipes could be of help.  It all boils down to a matter of preference.

Friday, January 4, 2013

Button Christmas Tree


Over Christmas, and the blizzard that really wasn't...I tried my hand at a craft.  For those of you who do not know me, I am OCD.  I have a hard time with crafts and scrapbooking because I want everything to be perfectly square, have even pictures, etc.  With that being said, I don't know if you'll get a lot of complicated craft projects out of me!!!

I apologize for not taking pictures showing each step.  I totally spaced it until I was done.


Here is what you need:

Buttons - colors and sizes of your choice
Picture Frame with a cardboard backing - size to be determined by how big you want the project to be
Scrapbook paper - one sheet
Craft glue

Directions:

  • Start out by taking the glass out of your photo frame.  You will not need it. 
  • Next, cut the scrapbook paper to fit the cardboard in the back of the picture frame.
  • Glue the scrapbook paper to the cardboard and let dry.
  • While the paper and cardboard are drying, layout your buttons in a Christmas Tree pattern (or any pattern that you would like to make).
  • Once satisfied with how you want your pattern, put the cardboard/page back in the frame and start gluing the buttons to it.
  • Let dry completely.

It's as simple as that.


Thursday, January 3, 2013

Goodbye 2012 - Hello 2013


I have to admit that I've been horrible at blogging during the month of December.  Indiana had a so called "blizzard" that wasn't my idea of a blizzard at all.  Sure, it was cold, there was snow and the wind was blowing, but it's not what I would have referred to as a blizzard at all.  Regardless, on the farm, we prepared like we were going to be snowed in for a week.  I made a batch of vegetable soup, a batch of chili and of course some sweets.  Bill brought the generator up to the house and we were ready...for a typical snow!  I admit, I was disappointed, but I did have a total of 12 wonderful days off of work.

The year of 2012 had it's ups and downs.  The farm saw some needed upgrades, as did the house.  I said goodbye to my maternal grandmother in January and my paternal grandfather in February.  Bill suffered a severe infection in his foot in February after stepping on a board with nails in it.  That was a long six weeks of recovery for both of us.  As the months went on, I found it hard to believe that it was almost the end of the year.

In a recent newsletter for work, I wrote a little article about aging.  Getting older is wonderful when you're under 21.  Once you hit 21, let's face it, it's down hill from there.  Each year goes by faster and faster and I get older and older.  I don't mind though.  My mom has aged beautifully and so have both of my grandmothers.  There's hope for me.

I admit that I didn't make a resolution for New Year.  I'm fat, sassy and very happy.  Are there things I wish I could reconcile in my life...sure, and in time, I hope it happens.  Until then, I am going to love my Savior, love my husband and make 2013 the best year that I can.

Here's to you and your family.  To loving others more, trying new crafts and foods, and just enjoying life! 

Happy 2013!