Thursday, September 27, 2012

Ritz Chicken Casserole


Ritz Chicken Casserole
Need a quick meal to make for dinner?  Ritz Chicken Casserole, is a wonderful dish on a fall evening.  This is a leftover that my husband will always eat more of.  It feeds 3-4 people.  My friend Judy introduced me to this recipe and it's a keeper!

Here is the recipe:

Ingredients:
2 cups of chicken, cut up
1 egg, beaten
1 can Cram of Chicken soup
2 slices of bread, torn up
1 stick margarine
1 roll of Ritz crackers, crushed
1 can Chicken Noodle soup


Directions:
Mix, chicken, egg, soups and bread in a 2 quart baked casserole dish.  Melt margarine and mix with crackers.  Add to top of first mixture and bake 45 minutes at 350 degree.

First, I cut up chicken.
 (Truth be told, this is left over KFC chicken that I used - I cheated).
This is only the first cup worth.

Next, I set out the bread, egg and soups.

Add the beaten egg.

Then tear up the 2 slices of bread and add to the mixture.

Next, add the cans of soup.

Blend the mixture well. 
You will want to stir the mixture completely.

In a small bowl, dissolve a stick of margarine.

Add the Ritz crackers to the butter and stir.
Coating well.

Add the Ritz mixture to the top of the casserole.
Cook for 45 minutes at 350 degrees.

This is what it looks like when it's straight out of the oven.

No dishes for me tonight except the spoon.
YUM!


Wednesday, September 26, 2012

Canning Jar Cotton Ball and Q-tip Holder


I wanted something different in my bathroom to
hold my cotton balls and Q-tips.  After looking at
different web sites, I cam across the above item
that I could make on my own...cheaply!


To begin, I picked out a blue canning jar,
purchased a votive holder from the Dollar Store
for $1.00 and then set out the cotton balls and Q-tips.


After washing and thoroughly drying the jar, I added
balls in the bottom.


Next, I set my votive holder in the top of the
jar and added the Q-tips.


Put the item on my shelf in the bathroom and am pleased
with the outcome!  Plus it makes my bathroom shelf
more organized and not so cluttered!


Thursday, September 20, 2012

Fifty Shades of WOW!

So, how many of you have read or are reading "Fifty Shades of Grey?"  All I can say is wow!  How does one talk about this new phenom that is taking over Hollywood?  I mean there is the trilogy book set, a magazine and now they are discussing a movie and who should play the characters.

Let's start with the first book - FIFTY SHADES OF GREY
When one of my friends told me that I needed to read this, I just wasn't sure.  Every girl likes a romance novel and this is a lot more than romance.  The first book captures you from the beginning.  Without giving anything away, you meet the characters, you learn how powerful and wealthy Mr. Christian Grey is, Christian and Anastasia's ages, and well, more about the Christian Grey world and secrets.

The second book - FIFTY SHADES DARKER
I suggest purchasing the trilogy of books.  If you get started with the first book, you are not going to want to be cliff hanging to wait and buy the second book.  In the book, you dig deeper into the lives of Christan and Anastasia, their passion for one another, their fears, and you get to know the characters on a more intimate, personal level.  You learn why Christian is the way he is and how Anastasia learns to cope with it.

The third book - FIFTY SHADES FREED
This was my least favorite of the books, but the story line was not complete yet, so the author almost had to write this book.  Then again, did she have to or was it amount the money?  I don't want to discourage you from reading this final book.  It gives you the ending and fills in several details that left you guessing in the second book. 

I am not a book critic by any means, but I did enjoy reading this trilogy and felt the author did an excellent job of captivating you from the beginning.  The story lines and characters are interesting and it leaves you with the romance novel feel...but perhaps better:) 

Wednesday, September 19, 2012

Reese Cup Brownie Trifle


Reese Cup Brownie Trifle


Who doesn't love the great taste of peanut butter and chocolate?  This particular recipe will be devoured in no time at all and leave guests wanting the recipe.  It's simple to make and you won't be disappointed.

Ingredients:
1 box of fudge brownie mix (you'll want one for a 9x13 pan)
2 regular size packages of Reese Peanut Butter Cups
4 cups milk
2 packages of instant vanilla pudding mix
1 cup creamy peanut butter
4 teaspoons of vanilla extract
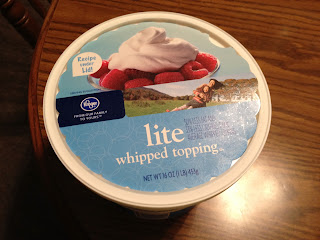
1 16-oz carton of frozen whipped topping (thawed)


Directions:
Prepare and bake brownie mix according to the directions on the box.  Be sure no to over bake!


Let brownies cool completely after cooking.  Then cut the brownie into small bite size portions.

Next open all of you Reese Cups and cut them into 1/2 size pieces and set aside.


In a large mixing bowl, mix the milk and the pudding mixes together.  I used a blender to save time.  Note that the mixture will be somewhat thick. 


Now you will want to add your peanut butter and vanilla extract to the pudding mixture.


As you can tell, the mixture is extremely thick.


Now you are ready to fold in your thawed whipped topping.
There you have it, an excellent peanut butter tasting pudding mix!

You will want about a 5 quart glass dish to hold your trifle.  First, add a layer of brownies, then top with Reese Cups, then the pudding mixture.  Repeat steps until all ingredients are gone.  You should end up with the pudding on top.  Garnish with the remaining Reese Cups. 

Chill in fridge at least 2 hours before serving.

Tuesday, September 11, 2012

Slow Cooker Chocolate Cake

Slow Cooker Chocolate Cake and some with ice cream to top it off.

Today is my birthday.  Thirty seven years ago today, in the afternoon, my wonderful mother gave birth to me.  Thank you mom, because I am sure that was no easy task.

Since my husband doesn't really bake and I wanted a homemade chocolate cake of some kind for my soon to be birthday, I decided on a recipe that I could make in my slow cooker.  This chocolate cake is moist, chocolaty and delicious with a scoop of ice cream...Happy Birthday to me!

The great thing about this cake is that you can experiment with it.  For example, if you don't like chocolate cake, go with white cake and add vanilla pudding.  You can also use different kinds of morsels such as vanilla or butterscotch.  The possibilities are endless.  Be creative!

Slow Cooker Chocolate Cake
1 box of your cake preference - I used a chocolate cake mix
2 cups of sour cream
1 small box of instant pudding - I used chocolate
1/2 a bag (6-oz) of semisweet chocolate chip - Are you seeing a theme with me and chocolate:)
3/4 cup of oil
4 eggs
1 cup of water

First thing I did, was get all of my ingredients ready.  As you can see, there really is not need for "name brand" items.  I am using the Kroger Brand variety of products.
 
Next, I sprayed my slow cooker with vegetable spray.  You'll want to spray
the entire slow cooker as the cake will rise.
 
I dumped my cake mix into the bowl.
 
I added the chocolate pudding next.
 
Next, 2 cups of sour cream.
 
3/4 cup of vegetable oil and 1 cup of water were now added.
 
4 eggs
 
Mix thoroughly and put into the slow cooker.
 
 
I cooked mine on high for about 1.5 hours.
You can cook on low for 3 hours.
Make sure you watch it so it doesn't burn.
Once you stick a toothpick in and it comes out clean, the cake is done!
Serve warm with ice cream.
 

Wednesday, September 5, 2012

Tomato Powder

I love to can and have canned about 50 pounds of tomatoes this summer.  After I had canned all I wanted, I brought out my dehydrator and decided to make some tomato powder to add to chili, bread, taco mixes and anything else I can think of.


The first thing I did was get my dehydrator out and clean it (basically, just dusted it off and wiped down the trays).


I sorted through the tomatoes, to make sure that I had good plump solid tomatoes to use.  These are salsa tomatoes that I purchased from one of my co-workers.


Next, I washed the tomatoes.

Blogger note:  I tried dehydrating the tomatoes two ways.  The first one was to boil the tomatoes for 1 to 2 minutes until the skins broke, dip them in cold water and then remove the skins and seeds.  I did one batch of tomatoes this way, but when I did the second batch with the skins on and the seeds in, it worked just as well.  Therefore, of the three batches I did, I only did one batch without the skin and seeds.  It made it so much easier for me.  If you want your tomato powder to be of fine consistency, however, you will want to de-seed your tomatoes.


Next, I sliced the tomatoes, about the size you would cut for it to go on a sandwich, and lined the dehydrator with the slices.  I didn't overcrowd the tomatoes, I left room between each slice.

I then set my dehydrator on 135 degrees and set my timer for 10 hours.  I flipped the tomatoes over half way through the process and rotated my trays.


When it was all said and done, this is what they looked like once they were dehydrated.  Some of the heels (or ends) of the tomatoes were given to the chickens because they didn't dehydrate as well.


After all those tomatoes dried, they were able to fit in this quart size container.


From there, I took the tomatoes and added them to my blender to grind them up.  I put half of the dehydrated tomatoes in and then added the rest once those were completely ground. 


When it was all said and done, here is the end result.  I added a 1/4 slice of bread on top to take any leftover moisture out of the tomatoes and to keep them fresh.  You can grind your tomatoes to suit your needs. 

I already added my tomato powder to a batch of spaghetti I made and it was excellent!  I am extremely pleased with the outcome.


Tuesday, September 4, 2012

Snickerdoodle Brownies

Well, it's been a week since I've last posted anything.  I used to love Labor Day weekend and all of the garage sales and the local Farmer's Pike Festival, but now this weekend serves only as a reminder of the anniversary of my baby brother's car accident that took his life back in 2008. He was in his early 20's had his entire life ahead of him.  I miss him so much.

Having said that, I tried another Pinterest recipe that sounded delicious (and something I thought my brother would have liked) and it's a recipe you will definitely want to drink with a glass of milk...here it is:


This is the completed product. 
Doesn't look the best, but it was delicious!
SNICKERDOODLE BROWNIES

2 2/3 cups flour
2 teaspoons baking powder
1 1/4 teaspoons cinnamon
1 teaspoon kosher salt
1 cup butter, room temperature
2 cups brown sugar, packed
2 eggs
1 tablespoon vanilla

Topping:
2 tablespoons sugar
2 teaspoons cinnamon

Directions:

Preheat the oven to 350 degrees.  Lightly grease a 9x13" baking pan.
In a large bowl: mix flour, baking powder, 1 1/4 teaspoon cinnamon and salt.  Set bowl aside.
In a medium bowl: beat butter, eggs and brown sugar until blended, then add the vanilla.  Mix well.
Then add the contents of your medium bowl to your large bowl and stir until well mixed.
Spread the mixture evenly into the pan.  It will be a thick batter, almost the consistency of cookie dough.

Next, mix the toppings: 2 T sugar and 2 teaspoons of cinnamon in a small bowl and sprinkle over top of the batter.

Bake at 350 degrees for about 25 minutes, or until a toothpick inserted into the center comes out clean. 

Let cool, then enjoy with a big glass of milk!